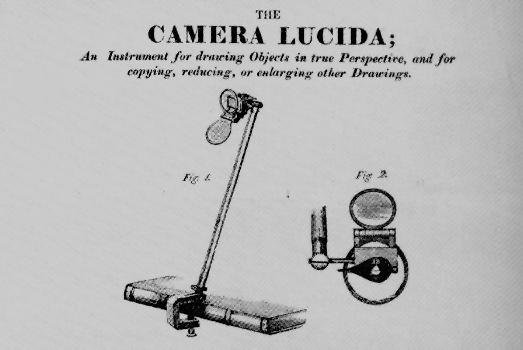
Fig. A - Shows 2 diagrams of the Camera Lucida |
|
The
Making of Audubon's 1st Royal Octavo Edition of Birds of
America using the Camera Lucida. By
Ron Flynn Click here to buy the Audubon Price Guides Even
while working on and finishing the Havell Edition of Birds of America
(1826-1838), John James Audubon was planning his next undertaking; a
smaller more affordable version of Birds of America that would
include omitted and newly discovered species. Referred to as his
“Great Work”, “little edition”, and several other names, it was
to be The 1st Royal Octavo Edition of Birds of America.
The
main reason for producing the octavo edition was to generate income for
the family, and so it became a family project. JJA would be on the road
selling subscriptions and contracting with selling agents. His son
Victor was to run the family’s business affairs from New York.
Finally, son John W. was assigned the job of reducing the double
elephant sized Havell prints to the agreed on octavo size, using the
Camera Lucida.
|
|
Fig. A - Shows 2 diagrams of the Camera Lucida |
|
THE
CAMERA LUCIDA “The
farther the prism is removed from the paper, that is, the longer the
stem is drawn out, the larger the objects will be represented in the
drawing and accordingly, the less extensive the view.
The nearer the prism is to the paper, the smaller will be the
objects, and the more extensive the view comprised on the same piece of
paper. In
copying drawings, the copy will be larger or smaller than the original,
according as the prism is more or less distant from the paper than it is
from the drawing to be copied. Thus,
if the drawing be two feet from the prism, and the paper only one foot,
the copy will be half the size of the original.
If the drawing be at one foot, and the paper three feet distant,
the copy will be three times as large as the original; and so for all
other distances.” DIRECTIONS
FOR USING THE CAMERA LUCIDA
“The
Instrument being fixed by the screw and clamp to the table and paper on
which the drawing is to be made, its stem should be inclined so as to
bring the prism nearly over the centre of the paper, and the pin, on
which the prism turns, placed truly horizontal. The
Instrument, as represented in the figures, may be used either with the
small round glass, turned up in front, Fig 1, or with the larger glass,
turned up level underneath the Instrument, Figure 2, (seen from above.)
But those who are short-sighted can only use the former, and
persons that are long-sighted must use the latter. The
prism is next to be turned upon its pin, till the transparent
rectangular face be placed opposite to the objects to be delineated,
when the upper black surface of the eye-piece (Figure 2) will be on the
top of the Instrument; and through the aperture in this, the artist is
to look perpendicularly downwards at his paper. The
black eye-piece is moveable, and in ordinary circumstances, is to be in
such a position, that the edge of the small transparent part at the back
of the prism shall intercept about half the eye-hole.
The artist then, looking through the eye-hole directly downwards
at his paper, should see the objects he wishes to draw, apparently
distributed over the paper. For,
since his eye is larger than the eye-hole, he sees through both halves
of the hole at the same time, without moving his head.
He sees the paper through the nearer half, and sees the objects
at the same time through the farther half, apparently in the same
direction, by means of reflection through the prism.” THE
POSITION OF THE EYE-HOLE “The
position of the eye-hole is the circumstance, above all others,
necessary to be attended to in adjusting the Camera Lucida for use; for,
on the due position of this hole depends the possibility of seeing both
the pencil and the objects distinctly at the same time. If
the eye-hole be moved, so that nearly the whole of its aperture be over
the paper, and a pencil and paper will be very faint. But there will always be an intermediate position (varying
according as the objects or the paper happen to be most illuminated) in
which both will be sufficiently visible for the purpose of delineation,
though not quite so clear as to the naked eye.
This intermediate position is easily found, with a little
practice. If
objects can be seen distinctly on the upper part of the paper, but not
upon the lower, the Instrument requires to be turned upon its pin, so
that the transparent face may be inclined rather downwards, and the
contrary for seeing the upper part of the view. Many persons, upon first attempting to use this Instrument, occasionally lose sight of their object or their pencil, merely by means of a little motion of their head, backwards and forwards, of which they are not aware, in breathing; but a very little practice soon obviates this difficulty.” |
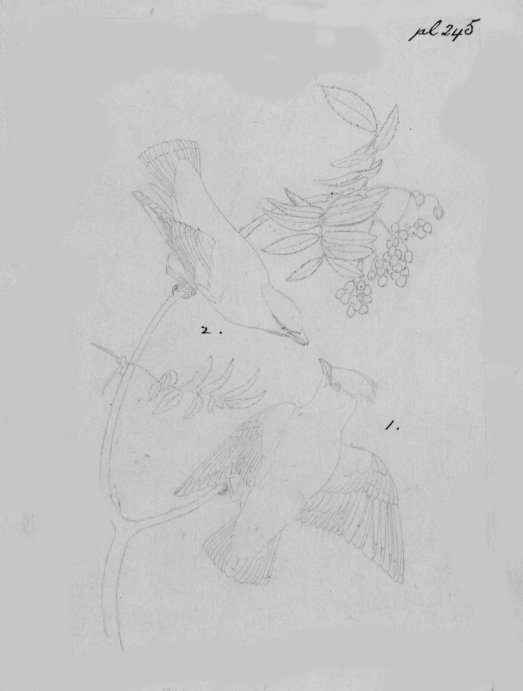
Fig. B - Audubon's Camera Lucida pencil drawing of plate #245, the Black-throated Wax Wing |
|
After
reading
how the Camera Lucida was operated, you can imagine how difficult and
tedious it was to make each drawing. Yet each drawing was only a simple
pencil outline. You will notice the outline of the forked branch, with 3 leaf clusters,
and some flower clusters at the upper right. The 2 birds (1. male and 2.
female) are perched on the forked branch. PRINTING
From
Audubon’s Camera Lucida pencil outline drawing, J.T Bowen’s
lithographic artists would take over.
They would trace over Audubon’s outline drawing with a red or
brown pencil, and then place it face down on the lithographic stone. By
rubbing over the back of the Camera Lucida drawing, they would transfer
the image to the lithographic stone. The lithographic artist would then
fill in and add details on the stone, using special greasy or waxy
crayons, to complete the drawing. Finally, bathing the stone in gum
Arabic and nitric acid to “fix” the drawing finishes the stone. It
is then ready for the pressroom. R. Trembley and W.E. Hitchcock were the
most noted of all of Bowen’s lithographic artists. The
skill of the pressmen is just as important as that of the lithographic
artist in producing a quality print. The stone is wetted and then sticky
greasy black ink is applied with a roller. The ink adheres to the greasy
crayon drawing on the stone, but is repelled by the blank wet areas of
the stone. The pressmen or printer lays a sheet of paper on the stone,
and using the press applies tremendous pressure. He then “pulls” the
print off the lithographic stone. After drying, the prints are ready for
hand coloring.
|
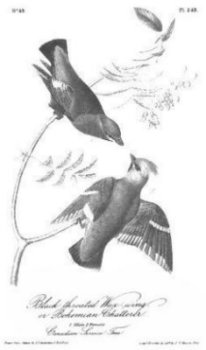 |
Fig. C an uncolored print of plate #245 the Black-throated Wax Wing |
|
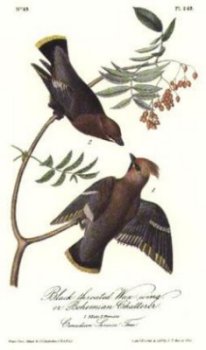
HAND
COLORING J.T.
Bowen employed the best colorists available in Philadelphia. He
patterned his “studio” after the Currier & Ives shop in New
York. Teams of colorists, mostly young women, sat around long tables.
Each table would have a model or colored proof, approved by one of the
Audubons, displayed for all to see. Each colorist would be assigned a
specific section of the print, and only one color to apply. The print
would be passed around the table until it was fully colored. It would
then pass to a “finisher”, at the head of the table, who would check
and complete the print with touchups and highlighting. After
drying, the finished colored prints were undoubtedly stored in a series
of individual bins, where they could be easily pulled to fill
subscription orders as they arrived.
|
|
Fig. D a finished hand colored print of plate #245 the Black-throated Wax Wing
|
 |
|
BIBLIOGRAPHY Durant,
Mary and Harwood, Michael, On The Road With John James Audubon,
1980 Flynn
Family Trust, Permanent Art Collection Hill Memorial Library, Louisiana State UniversityTyler,
Ron, Audubon’s Great National Work, 1993 Click here to buy the Audubon Price Guides
Copyright © 2008 by, Ron Flynn, ALL RIGHTS RESERVED Ron Flynn, 796 Holly Creek Dr., Holland, MI 49423 |